Authorization and Access Control
Learning Objectives
- You know how to protect routes from unauthorized access.
- You know how to make authenticated requests from the client.
At this moment, we have functionality for registering and authenticating users, and we can show the user information on the client. In addition, the server has the functionality for creating and verifying JWT tokens. However, we haven’t yet protected any of our server routes or data.
In this chapter, we look into protecting routes and data, and using authentication to control access to resources. This chapter focuses on protecting a simple route, while in the next chapter, we’ll look into protecting user-specific data.
Protecting routes
To verify that the user has the rights to perform the action they are trying to do, we need to authorize the user’s actions on the server. Authorization must always happen on the server: client-side checks are only for user experience, as they can be easily bypassed.
When protecting routes, the first step is to decide what to protect and the second step is defining the route so that when accessing it, we can verify whether the user is authorized to access it. This typically involves using middleware to inspect the request for information such as an authentication token, and then validating the request based on the token.
Secret endpoint
Let’s start with a simple example. Create an API endpoint that returns a secret message.
Add the following route to your app.js:
app.get("/api/secret", (c) => {
  return c.json({ message: "This is a secret message!" });
});
By default, this endpoint can be accessed by anyone without authentication:
$ curl localhost:8000/api/secret
{"message":"This is a secret message!"}
This is not secure. We want that the endpoint can be accessed only by authenticated users.
Authentication middleware
When using JWT, checking whether a user is authenticated involves validating the token that the user sends with their request. As this would be done for all routes that require authentication, it’s best to implement this as middleware.
Let’s create a middleware function that checks for a valid token. The function will work as follows:
- Extract the token from the Authorization header
- Verify the token
- Extract user information from the token
- Add user information from the token to the context
Create a file called middlewares.js to the server-side application, and place the following code to the file.
import * as jwt from "@hono/hono/jwt";

const JWT_SECRET = "jwt_secret";

const authenticate = async (c, next) => {
  const authHeader = c.req.header("Authorization");

  if (!authHeader || !authHeader.startsWith("Bearer ")) {
    return c.json({ error: "Missing or invalid authorization header" }, 401);
  }

  // Drop the "Bearer " prefix to get the token
  const token = authHeader.substring(7);

  try {
    const payload = await jwt.verify(token, JWT_SECRET);
    c.set("user", payload);
    await next();
  } catch (error) {
    return c.json({ error: "Invalid or expired token" }, 401);
  }
};

export { authenticate };Then, update app.js to use the middleware for the /api/secret route:
// ... other code
import * as middlewares from "./middlewares.js";

// ... other code
app.use("/api/secret", middlewares.authenticate);
app.get("/api/secret", (c) => {
  return c.json({ message: "This is a secret message!" });
});

// ... other code
Now, when we try to access the API without a token, we see that the API returns the 401 status code:
$ curl localhost:8000/api/secret
{"error":"Missing or invalid authorization header"}
To access the protected endpoint, we first need to log in and get a token. To do this, let’s first create a user and then login with that user to get a token:
$ curl -X POST -d '{"email": "user@user.com", "password": "secret"}' localhost:8000/api/auth/register
.. server response
$ curl -X POST -d '{"email": "user@user.com", "password": "secret"}' localhost:8000/api/auth/login
{"message":"Login successful","user":{"email":"user@user.com"},"token":"eyJhbGciOiJIU..."}
Now we can use that token to access the protected endpoint:
$ curl -H "Authorization: Bearer eyJhbGciOiJIU..." localhost:8000/api/secret
{"message":"This is a secret message!"}Authenticated API requests from the client
Now that we have an API endpoint that requires authentication, let’s add client-side functionality for accessing that endpoint. We already have a login page that stores the JWT token in local storage, so we just need to update our client-side code to include the JWT token when making requests to protected endpoints.
Helper function for authenticated requests
As authenticated requests will be common, it’s best to create a helper function for making authenticated requests. Create a folder utils to src/lib, and create a file called fetchUtils.js into it. Add the following code to the file:
import { browser } from "$app/environment";
import { useAuthState } from "$lib/states/authState.svelte.js";

const authState = useAuthState();

const authFetch = async (url, options = {}) => {
  if (!browser) {
    throw new Error("Authenticated fetch can only be used in the browser");
  }

  const token = authState.token;

  if (!token) {
    throw new Error("No authentication token found");
  }

  const headers = {
    ...options.headers,
    "Authorization": `Bearer ${token}`,
    "Content-Type": "application/json",
  };

  const response = await fetch(url, {
    ...options,
    headers,
  });

  if (response.status === 401) {
    // Invalid or expired token
    authState.logout();
    window.location.href = "/auth/login";
    throw new Error("Invalid or expired token");
  }

  return response;
};

export { authFetch };
The helper function authFetch retrieves the token from the authState store, adds it to the Authorization header, and makes the request. If the response status is 401 (Unauthorized), it logs out the user and redirects to the login page.
Making authenticated requests
Now, we can use the helped function for making authenticated requests. As an example, modify the +page.svelte file in src/routes to fetch the secret message when the user clicks a button:
<script>
import { authFetch } from "$lib/utils/fetchUtils.js";
import { PUBLIC_API_URL } from "$env/static/public";
let message = $state(null);
const fetchData = async () => {
try {
const response = await authFetch(`${PUBLIC_API_URL}/api/secret`);
const data = await response.json();
message = data.message;
} catch (error) {
message = error.message;
}
};
</script>
<button onclick={fetchData}>Fetch Protected Data</button>
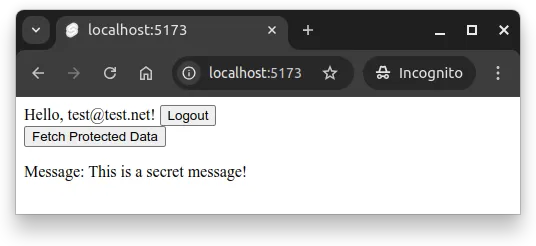
<p>Message: {message}</p>With the layout implemented in the previous part, the page at / now has a button that fetches the protected secret message when clicked. After clicking the button, the view would be similar to Figure 1 below.
On the other hand, if the user is not logged in and they try to click the button, they would see an error message as shown in Figure 2 below.
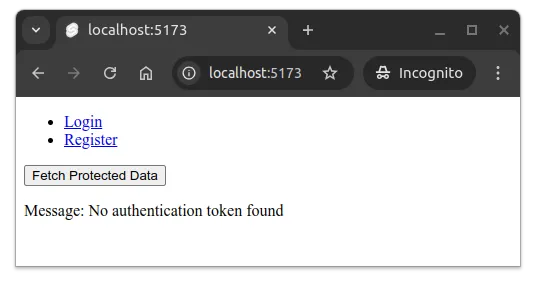
The error message is thrown by the authFetch function when it doesn’t find a token in the authState store.
Broadly speaking, the
authFetchfunction would be used as a drop-in replacement to thefetchfunction whenever making requests to protected endpoints. This way, the token is automatically included in the request, and we don’t need to manually add it each time.
Summary
In summary:
- Authorization must always be implemented on the server side. Client-side checks are only for improving user experience and can be easily bypassed.
- Authentication middleware validates JWT tokens from the Authorization header and adds user information to the request context, making it available to route handlers.
- Middleware can be applied to specific routes or groups of routes using Hono’s
app.use()method. - The
authFetchhelper function simplifies making authenticated requests from the client by automatically including the JWT token in the Authorization header and handling 401 errors by logging out the user and redirecting to login.