Client-Side Authentication
Learning Objectives
- You understand how to manage authentication state on the client.
- You can create login and registration forms that communicate with the authentication API.
- You know how to persist authentication state using browser localStorage.
- You can conditionally show UI elements based on authentication status.
- You understand how to use dynamic routes in SvelteKit for similar pages.
In the previous chapters, we created the API endpoints for user registration and login, and we also created JWTs that are returned to the client upon successful login. In this chapter, we look into the client-side authentication.
This involves multiple parts:
- Client-side Authentication API: Sending login and registration requests to the server and handling responses
- Authentication state management: Keeping track of whether a user is logged in and storing their information in persistent storage
- Login and registration forms: User interfaces for authentication
- Conditional UI rendering: Showing different content based on authentication status
Client-side authentication API
To interact with the authentication API we created in the previous chapter, we need to send HTTP requests from the client. Following what we did when learning about Client-Side API Modules, we can create a dedicated module for authentication.
Create a file called authApi.js in the folder src/lib/apis and place the following content in the file.
import { PUBLIC_API_URL } from "$env/static/public";

const login = async (credentials) => {
  return await fetch(`${PUBLIC_API_URL}/api/auth/login`, {
    method: "POST",
    headers: {
      "Content-Type": "application/json",
    },
    body: JSON.stringify(credentials),
  });
};

const register = async (user) => {
  return await fetch(`${PUBLIC_API_URL}/api/auth/register`, {
    method: "POST",
    headers: {
      "Content-Type": "application/json",
    },
    body: JSON.stringify(user),
  });
};

export { login, register };
The function login takes an object with the user credentials (email and password) and sends a POST request to the /api/auth/login endpoint. The function register takes an object with the user information (email and password) and sends a POST request to the /api/auth/register endpoint. Both functions return the fetch promise, which resolves to the response object.
Authentication state with persistent storage
To manage authentication on the client, we need a centralized place to store and manage the user’s authentication state. We’ve previously learned about Persisting State with LocalStorage, which is a good fit for this purpose.
Create a file called authState.svelte.js in the folder src/lib/states and place the following content in the file.
import { browser } from "$app/environment";
import * as authApi from "$lib/apis/authApi.js";

const USER_KEY = "user";
const TOKEN_KEY = "token";

let user = $state(null);
let token = $state(null);

if (browser) {
  const storedUser = localStorage.getItem(USER_KEY);
  const storedToken = localStorage.getItem(TOKEN_KEY);

  if (storedUser) {
    user = JSON.parse(storedUser);
  }
  if (storedToken) {
    token = storedToken;
  }
}

const useAuthState = () => {
  return {
    get user() {
      return user;
    },
    get token() {
      return token;
    },
    login: async (email, password) => {
      const response = await authApi.login({ email, password });

      if (!response.ok) {
        const errorData = await response.json();
        throw new Error(errorData.error || "Login failed");
      }

      const data = await response.json();
      user = data.user;
      token = data.token;

      localStorage.setItem("user", JSON.stringify(data.user));
      localStorage.setItem("token", data.token);

      return data;
    },
    register: async (email, password) => {
      const response = await authApi.register({ email, password });

      if (!response.ok) {
        const errorData = await response.json();
        throw new Error(errorData.error || "Registration failed");
      }

      return await response.json();
    },
    logout: () => {
      user = null;
      token = null;

      localStorage.removeItem("user");
      localStorage.removeItem("token");
    },
  };
};

export { useAuthState };
The authentication state module provides a useAuthState function that returns an object that allows managing shared authentication state. The module also provides the functions for logging in, registering, and logging out.
When the module is first loaded, it checks if there is any stored authentication data in
localStorageand initializes the state variables accordingly. Thebrowsercheck ensures that we only accesslocalStoragein the browser environment, as it is not available during server-side rendering. If you feel a bit rusty about how the shared state works, revisit the chapter Sharing State Between Components.
While localStorage is convenient for storing authentication data, it also has downsides. In particular, if is vulnerable to XSS (Cross-Site Scripting) attacks — if an attacker can inject JavaScript into your page, they can steal tokens from localStorage. We’ll discuss XSS in the chapter on Web Security Essentials.
Login and registration form
Let’s next create the login and registration forms. To keep them simple, we only ask for the email and password in both of them, so content-wise they are very similar.
As the forms are very similar, we can use the same component for both login and registration, with dynamic behavior based on the URL.
Dynamic routes and +page.js
As we might recall from the chapter Routing and Dynamic Pages, we can create dynamic routes using square brackets [parameter] and use them within Svelte components via the page object from $app/state.
Svelte also allows us to validate parameters in a +page.js file. The +page.js file is created to the same folder as the +page.svelte file, and it exports a load function that is called before the page is rendered.
This is useful when we want to restrict the valid values for a parameter prior to handling the +page.svelte file. We’ll be using this feature in the future quite a bit.
First, create a folder auth in the src/routes folder, and then another folder called [action] in the auth folder. Now, all requests to paths like /auth/login or /auth/register will be routed to the [action] folder, where [action] will be replaced with the actual value (e.g. “login” or “register”).
Create a file called +page.js in the [action] folder, and add the following code to it. The function load has an extra feature that we have not seen before: we use it to validate the parameters.
import { error } from "@sveltejs/kit";

export const load = ({ params }) => {
  if (params.action !== "login" && params.action !== "register") {
    throw error(404, "Page not found.");
  }

  return params;
};
The action property in the params object contains the value from the URL. In our case, it should be either “login” or “register”. If not, we use the error function from @sveltejs/kit to throw a 404 error.
Now, if you try to access a path like /auth/unknown, you should see a 404 error page, as shown in Figure 1.
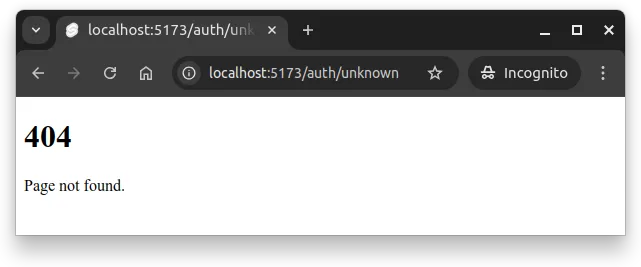
/auth/unknown/ shows an a 404 error page with the message “Page not found”.Login and registration form
Next, we’ll create the form that handles both login and registration. The form will change its title, button text, and link based on whether we’re on the login or register page.
As we are only creating a form, we do not need to create a separate component for it. Instead, we can place the form directly in the
+page.sveltefile. Building the form follows what we’ve learned in the chapter Forms and Form Events.
Create the file +page.svelte in the [action] folder, and add the following code to it.
<script>
  import { goto } from "$app/navigation";
  import { page } from "$app/state";
  import { useAuthState } from "$lib/states/authState.svelte.js";

  let message = $state("");
  let errorMessage = $state("");
  let isLoading = $state(false);

  const authState = useAuthState();

  const handleForm = async (e) => {
    e.preventDefault();
    errorMessage = "";
    message = "";
    isLoading = true;

    const formData = new FormData(e.target);
    const { email, password } = Object.fromEntries(formData);

    try {
      if (page.params.action === "login") {
        await authState.login(email, password);
        message = "Login successful! Redirecting...";
        setTimeout(() => goto("/"), 1000);
      } else {
        await authState.register(email, password);
        message = "Registration successful! You can now log in.";
        setTimeout(() => goto("/auth/login"), 2000);
      }
    } catch (error) {
      errorMessage = error.message;
    } finally {
      isLoading = false;
    }
  };
</script>

<h2>
  {page.params.action === "login" ? "Login" : "Register"}
</h2>

{#if message}
  <div>
    <p>{message}</p>
  </div>
{/if}

{#if errorMessage}
  <div>
    <p>{errorMessage}</p>
  </div>
{/if}

<form onsubmit={handleForm}>
  <label>
    <span>Email</span>
    <input
      id="email"
      name="email"
      type="email"
      placeholder="user@example.com"
      required
    />
  </label>
  <br />
  <label>
    <span>Password</span>
    <input
      id="password"
      name="password"
      type="password"
      placeholder="Enter your password"
      required
    />
  </label>
  <br />
  <button type="submit" disabled={isLoading}>
    {isLoading
      ? "Please wait..."
      : page.params.action === "login"
        ? "Login"
        : "Register"}
  </button>
</form>

{#if page.params.action === "login"}
  <p>
    Don't have an account? <a href="/auth/register">Register here</a>
  </p>
{:else}
  <p>
    Already have an account? <a href="/auth/login">Login here</a>
  </p>
{/if}
The form uses the useAuthState function to get access to the authentication state and functions. When the form is submitted, the handleForm function is called, which prevents the default form submission behavior, collects the form data, and calls either the login or register function from the authentication state based on the current action.
We also use a function called goto to redirect the user after a successful login or registration. The goto function is imported from $app/navigation. The user is either redirected to the home page after login or to the login page after registration.
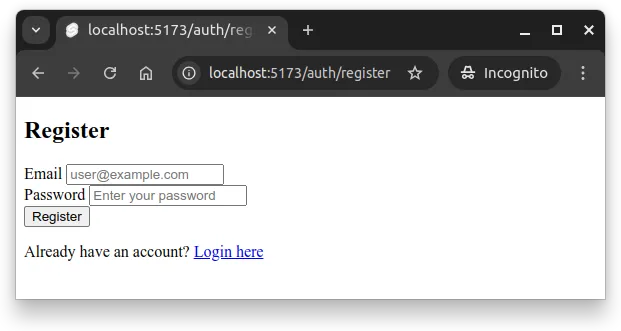
When the user navigates to the path /auth/register, the form looks similar to the one in Figure 2. The same form is used for both login and registration, with dynamic content based on the URL.
Showing auth state in the UI
Now that the client-side authentication flow is in place and we can log in and register users, we want to reflect show the authentication state in the user interface. This way, users can see whether they are logged in or not, and access relevant actions like logging out.
Such information is typically shown in the navigation bar or header of the application, on all pages.
If we want to show the authentication status on all pages, the best place to put it is in the layout file. This way, we avoid duplicating the code in multiple places. If you do not recall what layouts are about, visit the chapter Svelte Pages and Layouts.
Open (or create) the src/routes/+layout.svelte file and update it to use the authentication state:
<script>
  import { useAuthState } from "$lib/states/authState.svelte.js";
  let { children } = $props();
  const authState = useAuthState();
</script>

<header>
  {#if authState.user}
    <div>
      <span>Hello, {authState.user.email}!</span>
      <button onclick={() => authState.logout()}>Logout</button>
    </div>
  {:else}
    <ul>
      <li><a href="/auth/login">Login</a></li>
      <li><a href="/auth/register">Register</a></li>
    </ul>
  {/if}
</header>

<main>
  {@render children()}
</main>
The layout file now imports the useAuthState function and uses it to get the current authentication state. It conditionally renders different content in the header based on whether the user is logged in or not.
The user interface also provides a logout button — clicking it will clear the user from the authentication state, removing also the data from localStorage.
Finally, modify the file src/routes/+page.svelte to show a message “Welcome to the home page!”
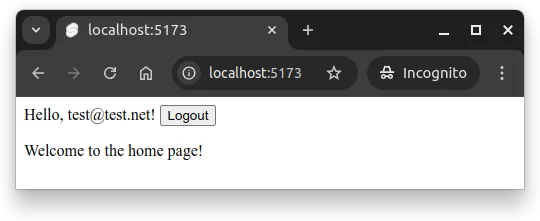
<p>Welcome to the home page!</p>Now, when you log in, you should see the user’s email and a logout button in the header, as shown in Figure 3. In the figure, the user’s email is test@test.net and the main content (in routes/+page.svelte) has the text “Welcome to the home page!”.
Summary
Much of the work in this chapter focused on rehearsing what we have worked with before, but now in the context of authentication. We created a client-side authentication API module, an authentication state module that uses localStorage for persistence, and a login/registration form that uses dynamic routing. Finally, we updated the layout to show the authentication status in the header.
In summary:
- A client-side authentication API module handles communication with the server’s authentication endpoints.
- Authentication state module is used for sharing the authentication state across components. The state is persisted in localStorage.
- Login and registration forms can be created using a single Svelte component with dynamic behavior based on the URL.
- We can use the
errorfunction to throw HTTP errors from theloadfunction in+page.js, including 404 errors for invalid routes. - The
gotofunction from$app/navigationcan be used for client-side navigation after successful login or registration.
- We can use the
- User information that should be displayed on all pages (like login status) can be placed in the layout file to avoid code duplication.
AI Study Aid
Create a chapter diagram
We're looking into to what extent AI-generated diagrams could help with studying.
Use this study aid to generate an AI-generated visual summary of the material you just studied.
Each diagram style emphasizes the content in a different way, so you can choose the focus
that feels most useful.
Using the diagram generator is voluntary and does not affect your course progress. We encourage
you to try it out and see if it helps, but it's totally up to you! Your answers help us understand
how to make better study aids in the future.